


GPIO State Listener Example using Pi4J.
The following example demonstrates how to setup a listener for GPIO pin state changes on the Raspberry Pi. This listener implementation is far more efficient than constantly polling and querying for the the GPIO pin state. The listener implementation is based on GPIO hardware interrupts not state polling.
Source Code
The source code for this example is included in the github repository:
https://github.com/Pi4J/pi4j-v1/tree/master/pi4j-example/src/main/java/ListenGpioExample.java
/*
 * #%L
 * **********************************************************************
 * ORGANIZATION  :  Pi4J
 * PROJECT       :  Pi4J :: Java Examples
 * FILENAME      :  ListenGpioExample.java
 *
 * This file is part of the Pi4J project. More information about
 * this project can be found here:  https://pi4j.com/
 * **********************************************************************
 * %%
 * Copyright (C) 2012 - 2021 Pi4J
 * %%
 * Licensed under the Apache License, Version 2.0 (the "License");
 * you may not use this file except in compliance with the License.
 * You may obtain a copy of the License at
 *
 *      http://www.apache.org/licenses/LICENSE-2.0
 *
 * Unless required by applicable law or agreed to in writing, software
 * distributed under the License is distributed on an "AS IS" BASIS,
 * WITHOUT WARRANTIES OR CONDITIONS OF ANY KIND, either express or implied.
 * See the License for the specific language governing permissions and
 * limitations under the License.
 * #L%
 */

import com.pi4j.io.gpio.*;
import com.pi4j.io.gpio.event.GpioPinDigitalStateChangeEvent;
import com.pi4j.io.gpio.event.GpioPinListenerDigital;

/**
 * This example code demonstrates how to setup a listener
 * for GPIO pin state changes on the Raspberry Pi.
 *
 * @author Robert Savage
 */
public class ListenGpioExample {

    public static void main(String args[]) throws InterruptedException {
        System.out.println("<--Pi4J--> GPIO Listen Example ... started.");

        // create gpio controller
        final GpioController gpio = GpioFactory.getInstance();

        // provision gpio pin #02 as an input pin with its internal pull down resistor enabled
        final GpioPinDigitalInput myButton = gpio.provisionDigitalInputPin(RaspiPin.GPIO_02, PinPullResistance.PULL_DOWN);

        // set shutdown state for this input pin
        myButton.setShutdownOptions(true);

        // create and register gpio pin listener
        myButton.addListener(new GpioPinListenerDigital() {
            @Override
            public void handleGpioPinDigitalStateChangeEvent(GpioPinDigitalStateChangeEvent event) {
                // display pin state on console
                System.out.println(" --> GPIO PIN STATE CHANGE: " + event.getPin() + " = " + event.getState());
            }

        });

        System.out.println(" ... complete the GPIO #02 circuit and see the listener feedback here in the console.");

        // keep program running until user aborts (CTRL-C)
        while(true) {
            Thread.sleep(500);
        }

        // stop all GPIO activity/threads by shutting down the GPIO controller
        // (this method will forcefully shutdown all GPIO monitoring threads and scheduled tasks)
        // gpio.shutdown();   <--- implement this method call if you wish to terminate the Pi4J GPIO controller
    }
}
JavaDoc
The following JavaDoc links are the primary interfaces used to listen for GPIO state changes:
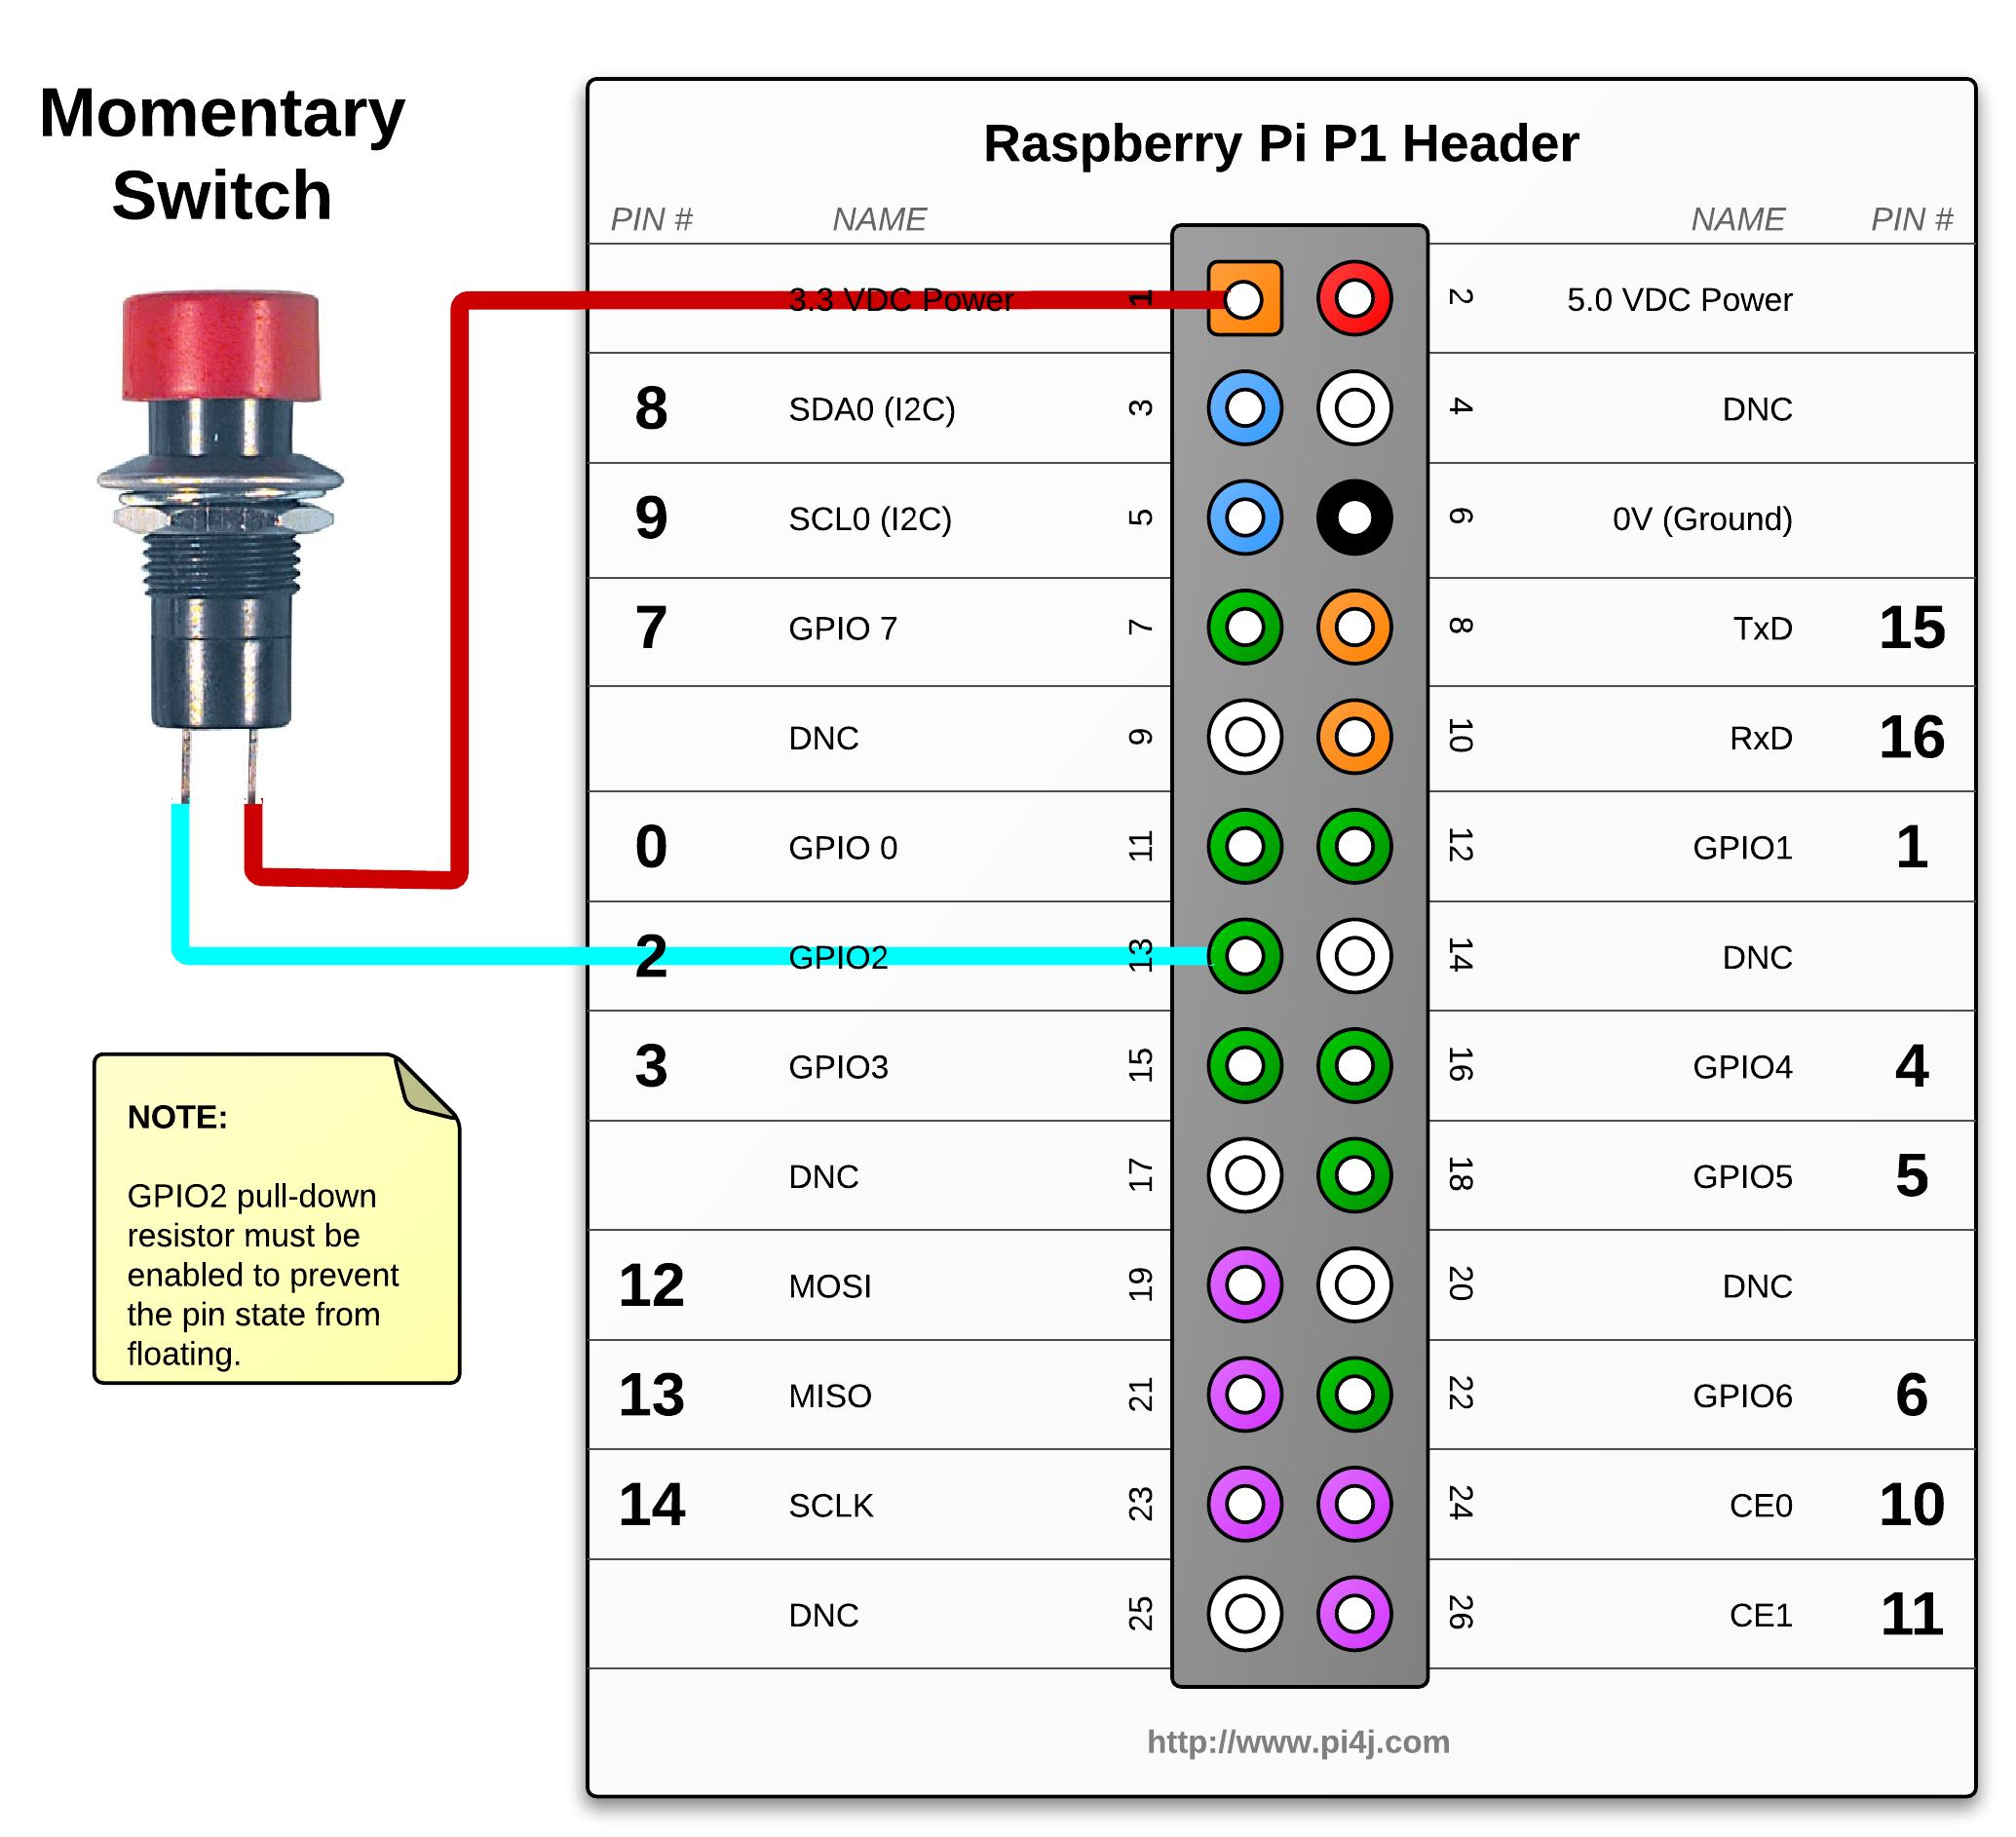
Wiring Diagram
The following circuit can be used in conjunction with this sample code.

Navigate
If you have not already downloaded and installed the Pi4J library on the RaspberryPi, then view this page for instructions on where to download and how to install Pi4J:
Download & Install Pi4J
First, locate the ListenGpioExample.java source file in the samples folder of the Pi4J installation on the RaspberryPi.
You can use the following command on the Pi's console or SSH terminal to navigate to this path: cd /opt/pi4j/examples
Compile
Next, use the following command to compile this example program:
javac -classpath .:classes:/opt/pi4j/lib/'*' -d . ListenGpioExample.java
Execute
The following command will run this example program:
sudo java -classpath .:classes:/opt/pi4j/lib/'*' ListenGpioExample
Output
You should see the following message on the console each time the momentary button is pressed:
--> GPIO PIN STATE CHANGE: 4 = HIGH
and this message on the console each time the momentary button is released:
--> GPIO PIN STATE CHANGE: 4 = LOW